Recurrent Event
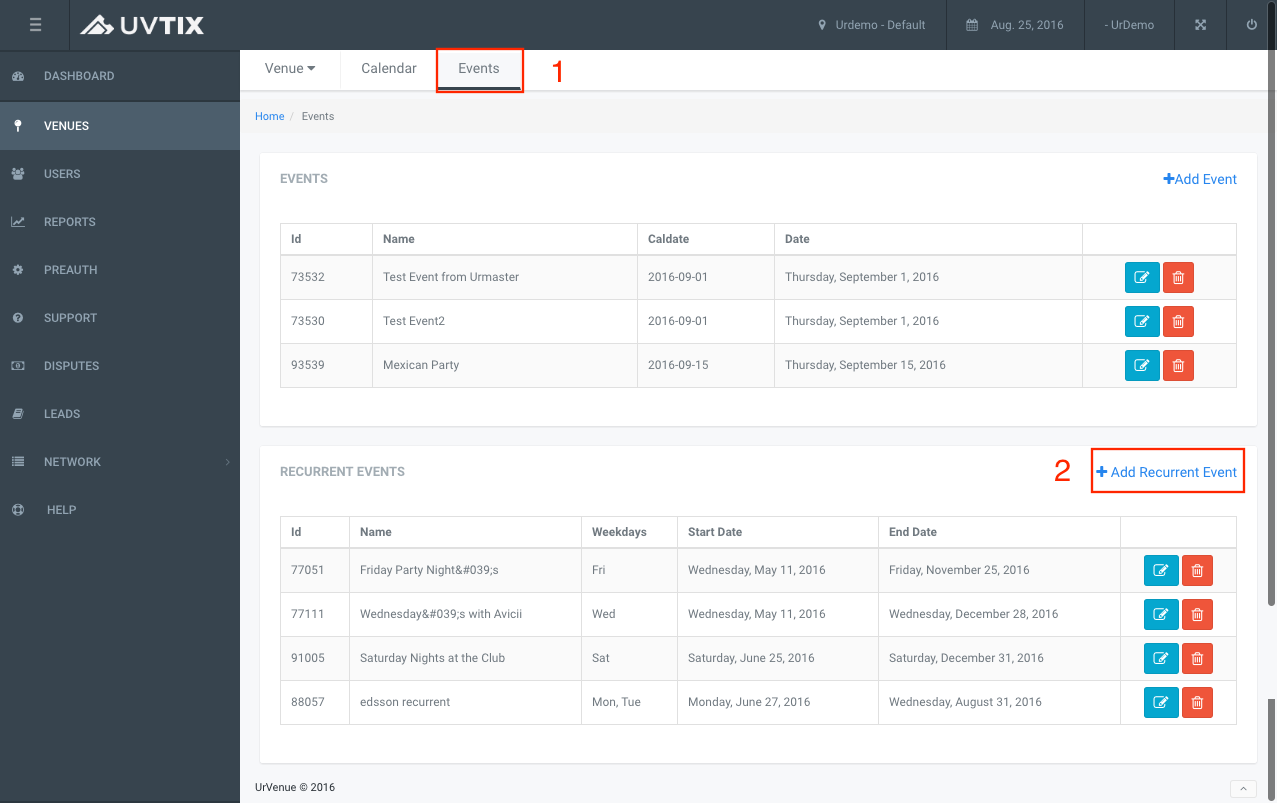
- Select event.
- Add Recurrent Event.
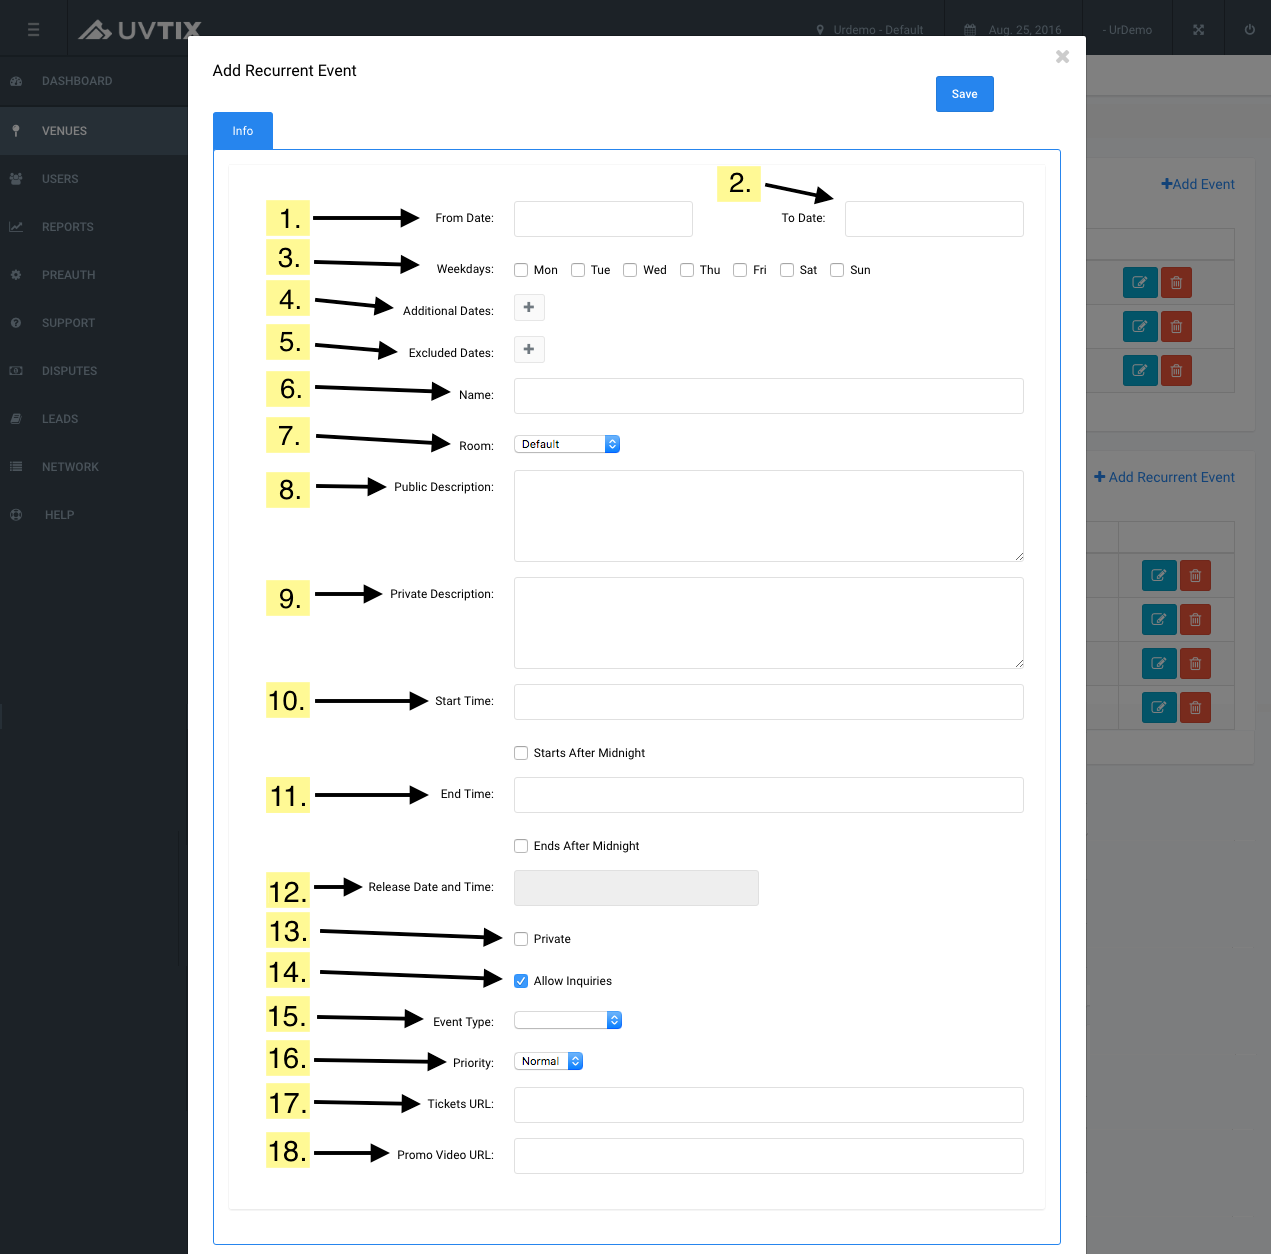 1.Select a start date for the event.
2.Select an end date for the event.
3.Select the days will be the event (for example, only Fridays).
4.You can add other days additionales (for example, the recurrent event is only Friday, but you like add one Saturday date, you need add this day on this part).
5.You can exclude some days (for example, on Friday will be a November 1th and the venue create a different event for this day, you need select November 1th on this part).
6.Add a name for the event.
7.The room is selected if the venue have more the one event at same day.
8.Input the event description.
9.Private description are internal instructions/notes for staff.
10.Select a start time for the event.
11.Select an end time for the event.
12.This feature gives you the option to create the event but not to publish it inmediately, it allows you to publish it at a later date on your website.
13.This feature allows you to make the event private.
14.The allow inquiries option is for public events.
15.The type feature gives you the option to choose what type of event it is (concert, festival, daylife, nightlife).
16.The priority feature allows you to define the way the event displays on your website slider or carousel, it's not necessary to choose one as they all display by date, unless you have over one event added per date.
17.Once the items have been created you can paste the ticket URL here.
18.If you have a video for this event you can paste the URL here.

-
Choose an image for your event.
-
Delete the images that you don't want to use.
-
Upload the selected image.
-
This feature allows you to see the image in its original size.
-
The image type will vary according to the number and dimension of the images added.
-
It allows you to select the best position for your image, depending on the image type.
- When your event is finished, don't forget to save your work.