Orders
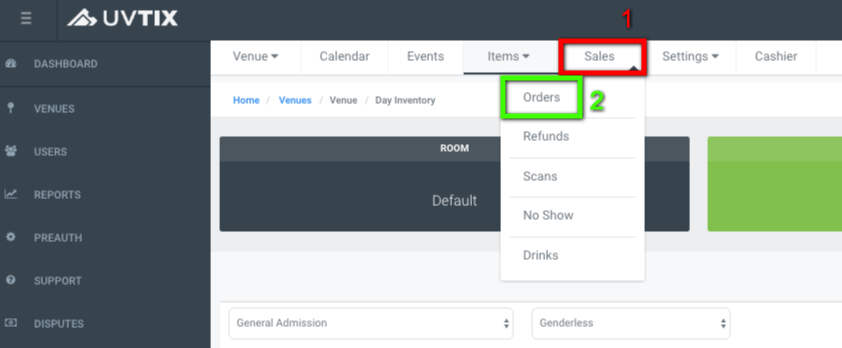
Once in UvTix, you can select a venue and a date to get to Sales (1).
By selecting Orders (2) in the dropdown menu you will see all the General Admission tickets and approved tables sold for that particular venue and date.
If you click on Filter by room (1) the sold items can be sorted by event, in case you have more than one. Or by clicking Filter by type (2) you can see only tickets, only tables, etc.

There is information in the list view, and some actions that can be performed:
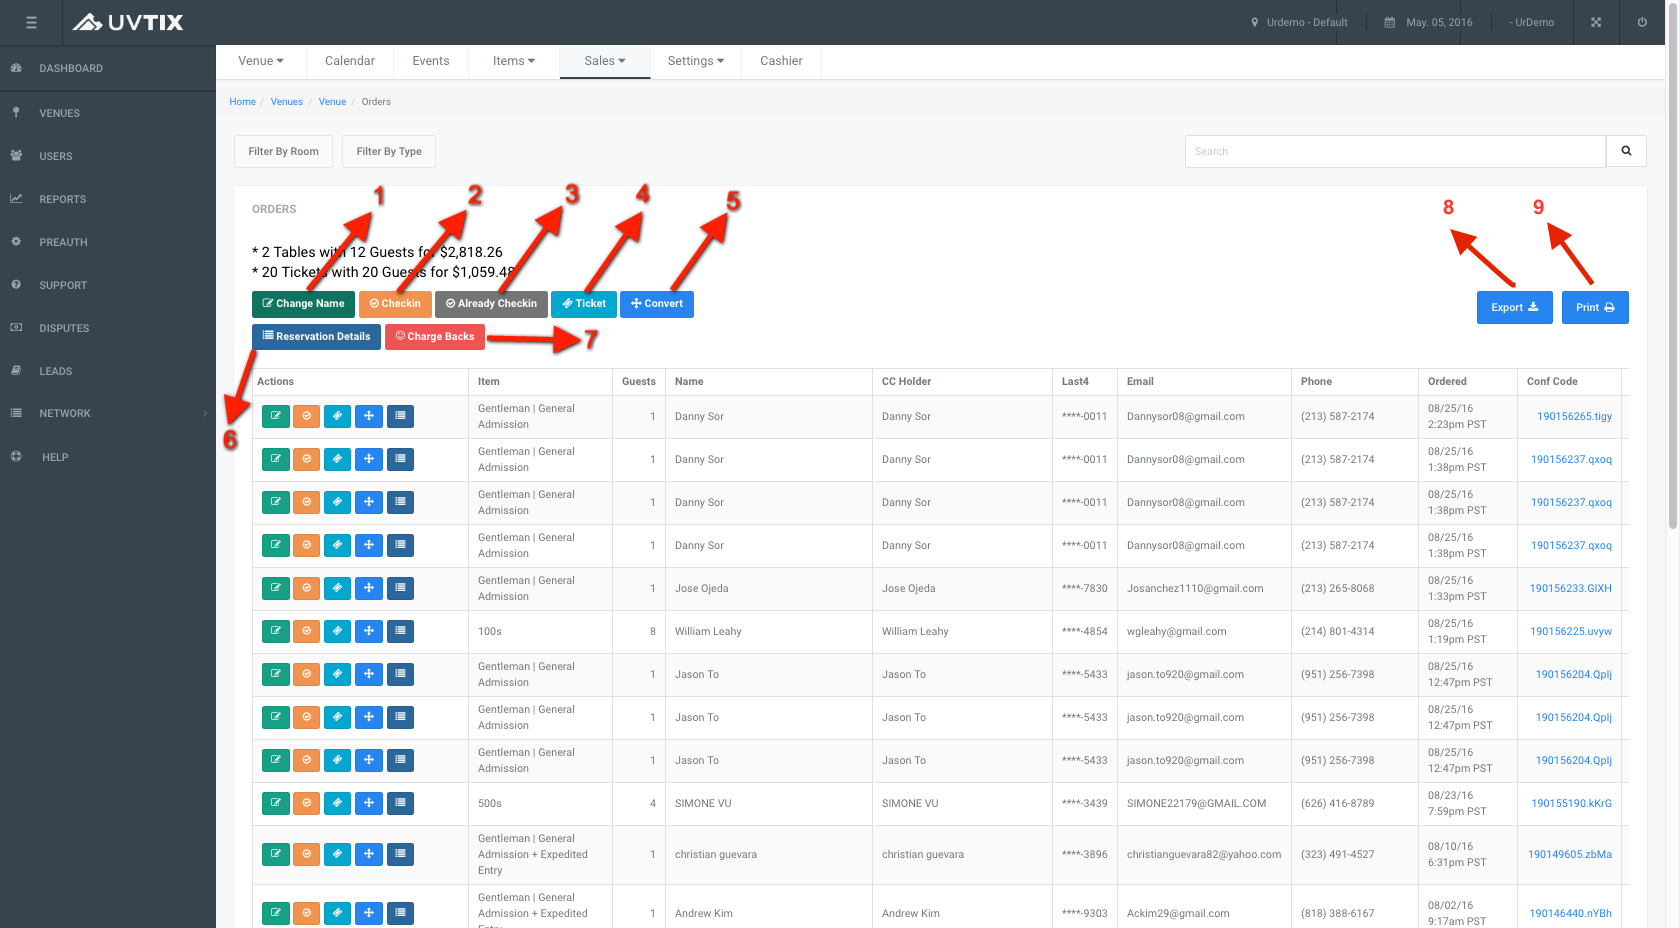
1. Change name:
Here you can change the first and last name for each ticket, only for General Admission tickets and Tables. Just click on the teal box next to the ticket you want to modify and enter the new information in the pop-up box. To save the changes click Yes. To discard the changes click No.
2. Check In:
This feature shows a status. If the ticket has an orange box next to it then it means the ticket has not been scanned or used yet. This is helpful for the venue management to take a decision when a refund request is submitted, to either approve or deny it, or to respond to a dispute.
3. Already Checked In:
This feature shows a status. If the box next to the ticket is gray then it has already been scanned or used to let the client into the venue. This is helpful for the venue management to take a decision when a refund request is submitted, to either approve or deny it, or to respond to a dispute.
4. Ticket:
If you click on the turquoise icon next to the ticket, a link would open in another tab and you can visualize the ticket in PDF format. You can copy the link and send it to the client by pasting it on an email, or download the ticket in PDF format and attach it.
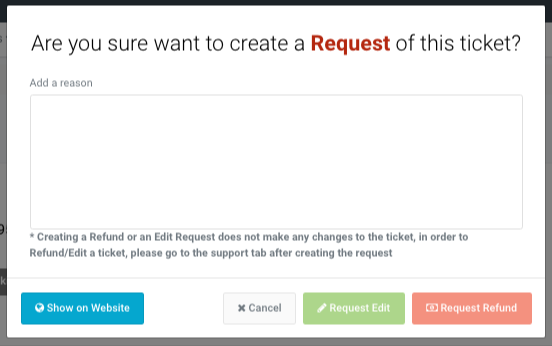
5. Convert:
By clicking on the blue icon next to the ticket, a pop-up window will open. This is the internal way to submit an Edit or Refund request on behalf of the client. In the box Add a reason you should provide the new name (Edit request) for the ticket, or the reason provided for the refund. Depending on the situation you can click either Request Edit or Request Refund at the bottom of the window to submit the appropiate request. To close this window click Cancel.
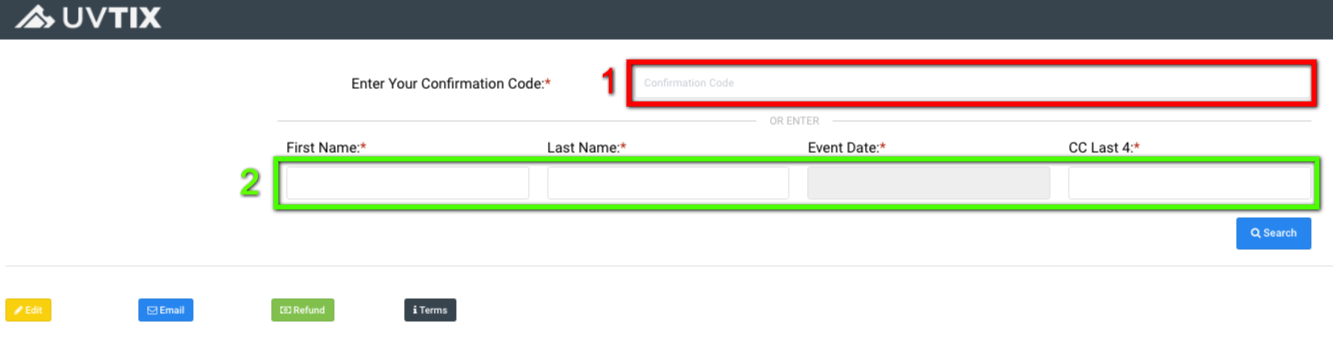
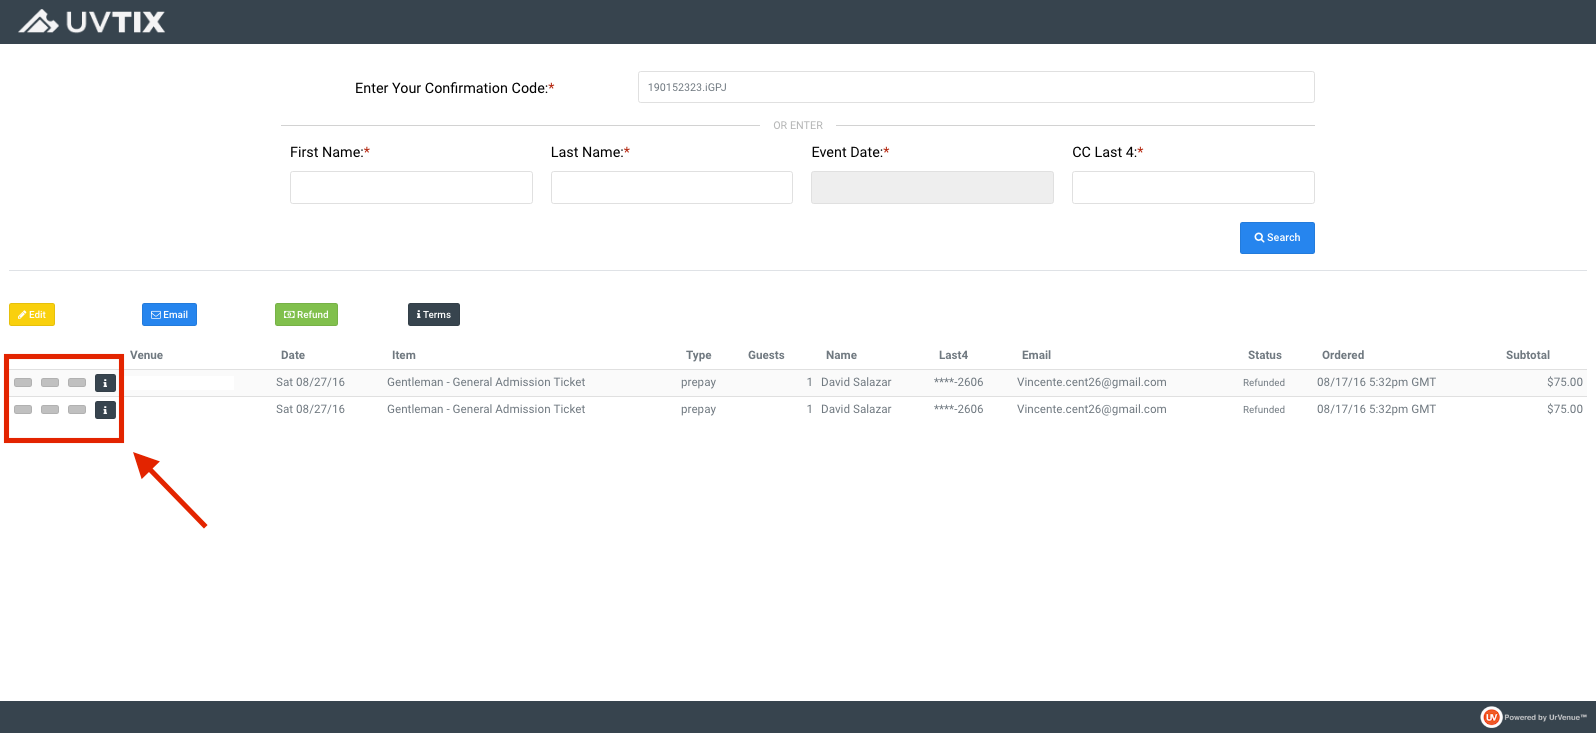
If you click the Show on website button, another tab would open with the public Uvtix website (http://uvtix.com/support/) where clients can submit these types of requests themselves. It allows the client to look for their reservation in 2 different ways:
- entering the complete confirmation code (9 numbers followed by a dot and 4 alphanumeric characters)
- by first name, last name, event date and the last 4 digits of the card used
There are 4 buttons on the left, next to each ticket:
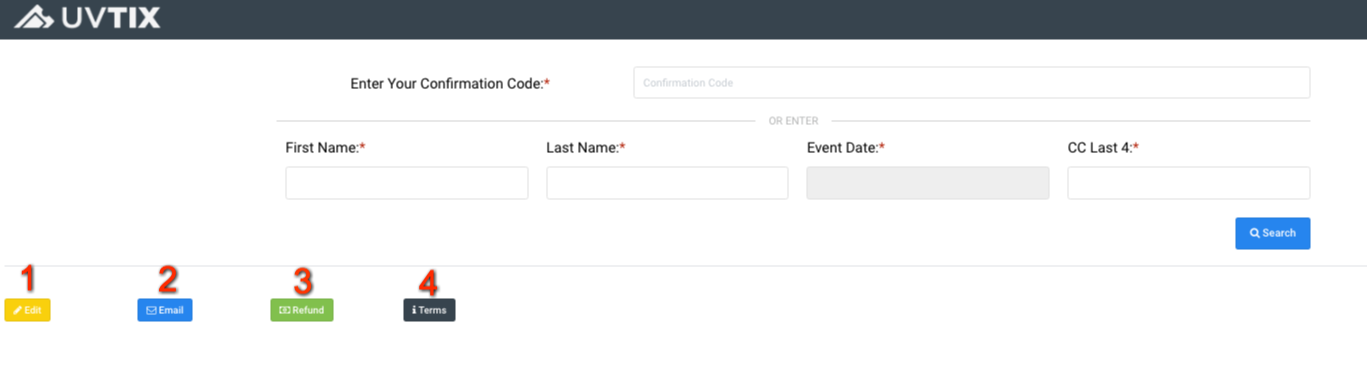
1. Edit: Opens a pop-up window to provide the new name for the ticket.

Click Request to submit and a message will display.

2. Email: Opens a pop-up window to enter an email address to send or resend a ticket.
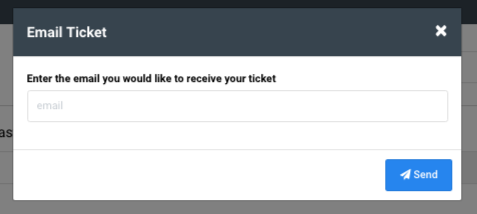
To submit click Send and a message will display.

3. Refund: Opens a pop-up window to submit a refund request, a reason must be provided.
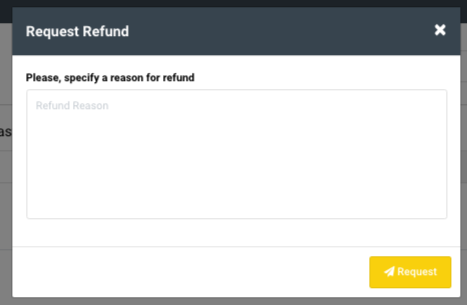
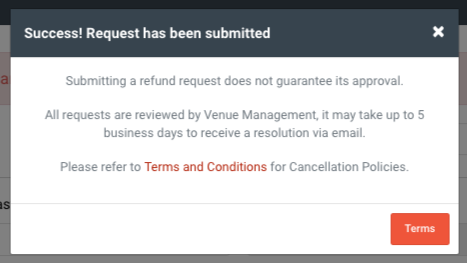
To submit click Request and a message will display.
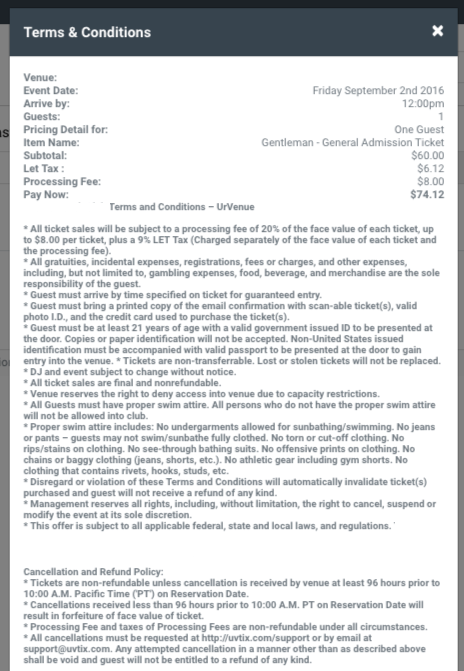
You can click Terms to visualize the conditions of the purchase, as these may vary for different venues.
4. Terms: Opens a pop-up window to visualize the Terms and Conditions for the reservation.
The public Uvtix website is helpful to avoid duplicating a refund request that has already been submitted, because it shows different status:
- Charge = booked
- Auth = authorized (tables pending of approval)
- Refund requested = pending of approval
- Refunded
Note: When a refund request is submitted, the green button on the public Uvtix website turns gray and the option gets deactivated. This is very helpful when dealing with many tickets under the same name and confirmation code.
However, from the Convert button (internal way) a refund request can be forced even when the public Uvtix website does not provide the option any more. Be careful to have authorization from your manager to do this, specially when you start getting familiarized with UvTix system.
6. Reservation Details:
This navy blue button opens a pop-up window that allows you to pull up the information from the system about a transaction and includes a default template to respond a dispute placed from the client through a bank or card company. By clicking the blue button on the bottom of the window you can Export this information in PDF format.
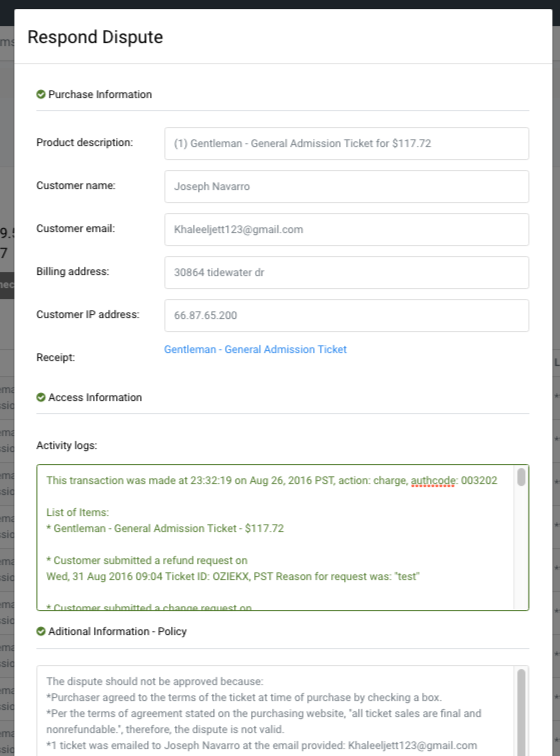
Note: Keep in mind that 1 confirmation code can be the same for 1 ticket or more because every client can purchase multiple tickets per transaction.
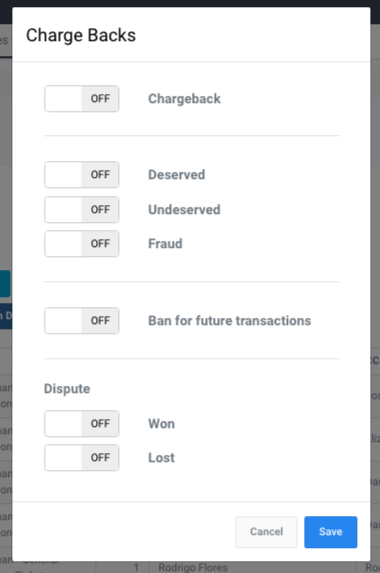
7. Chargebacks:
This red button next to a ticket lets you flag a transaction and all contact information involved (phone and email) from a disputed transaction to avoid future fraudulent transactions.
These options are turned on automatically when a dispute is processed according to the situation and outcome, however this can be manually updated too. Simply click the option to turn it on, then click Send to update, or Exit to discard the changes.
8. Export:
If you click this blue button, the list of orders converts into an XLS (Excel) file and is saved to your computer.
9. Print:
If you click this blue button, a pop-up window opens to select the printer, set up the printing characteristics or visualize the file in PDF format.