Guest List Tab
We would need to be on the day view for the specific event we would like to add the guest list for, click on the Guest List Tab on the bottom of the screen. 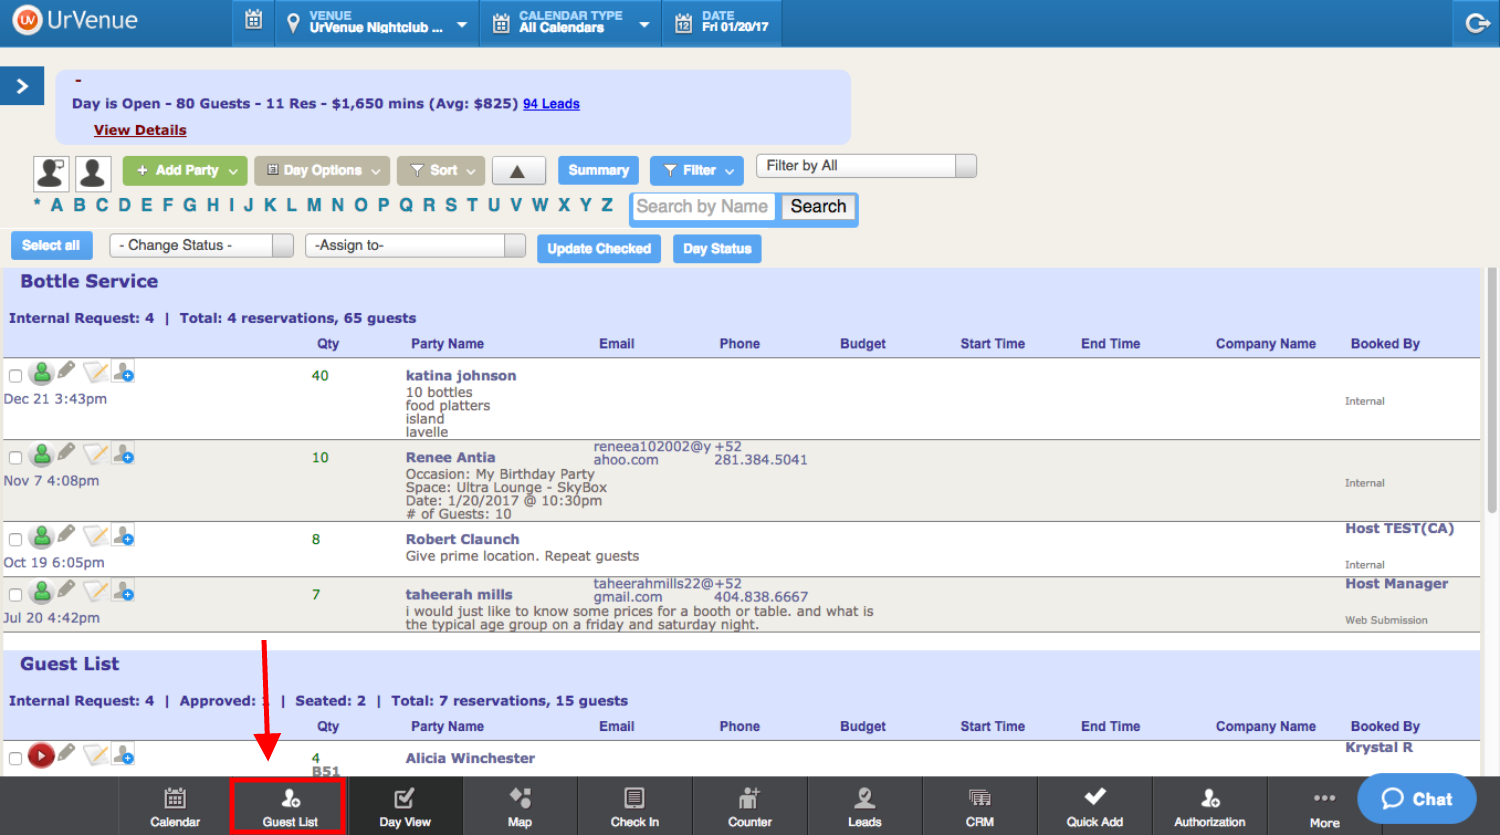
- You will now see the Guest list screen open, here we have various options.
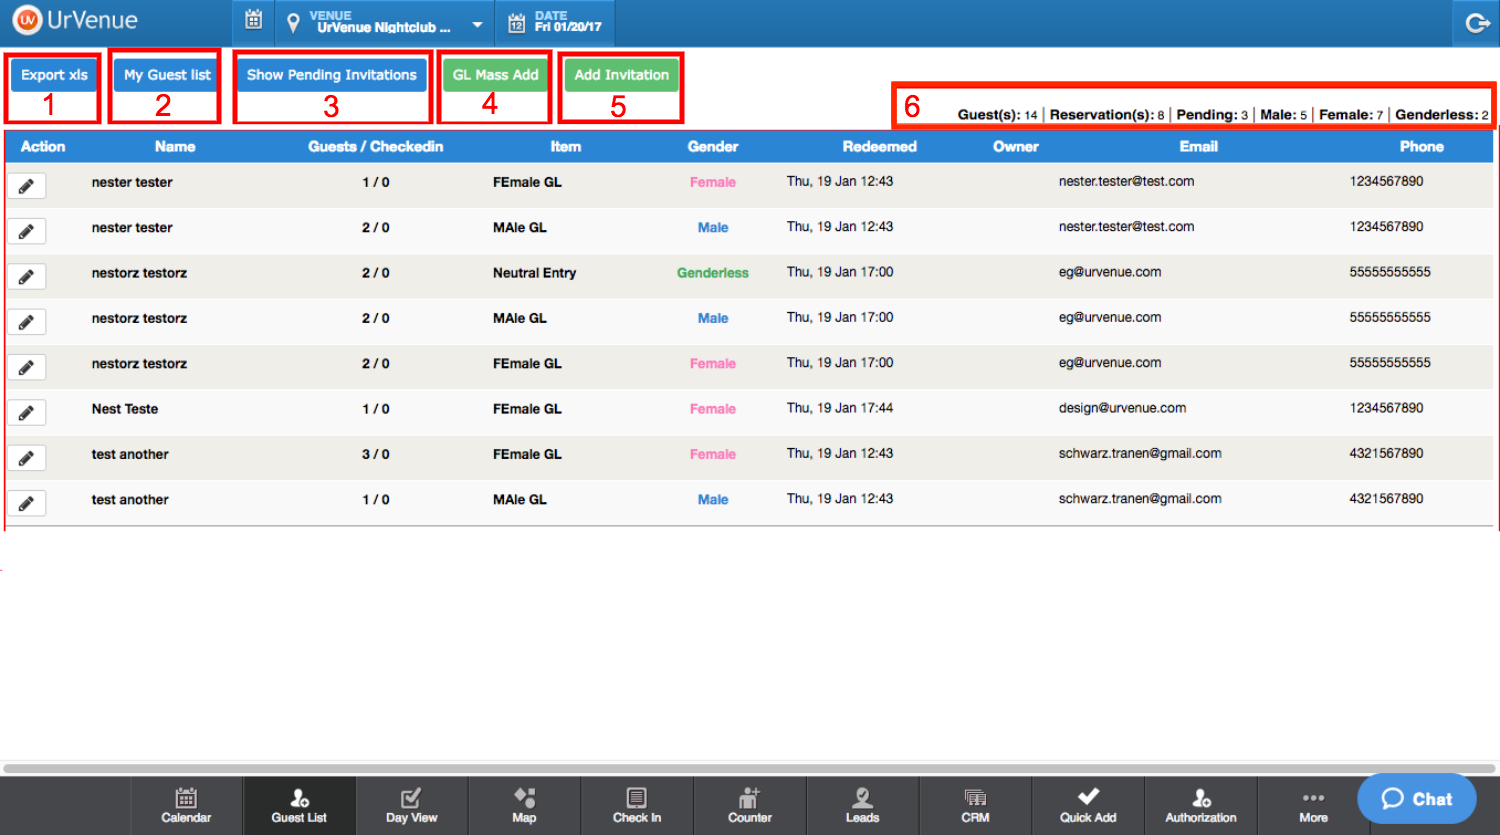
- Export XLS - This option allows you to download the guest list in an Excel Format, if you have the user access to do so.
-
My Guest List / All Guest List - This option will allow you to see your guest list if you have any, click on this button again to see all guest list and you will see all guest lists for the specific date.
-
Show pending / Show GL - The screen we see now are the guest lists that have confirmed or redeemed their guest list entries, if we click on show pending we will be able to see the guest list invitations that have not been confirmed or redeemed, click on the button again and you will see all guest lists redeemed.
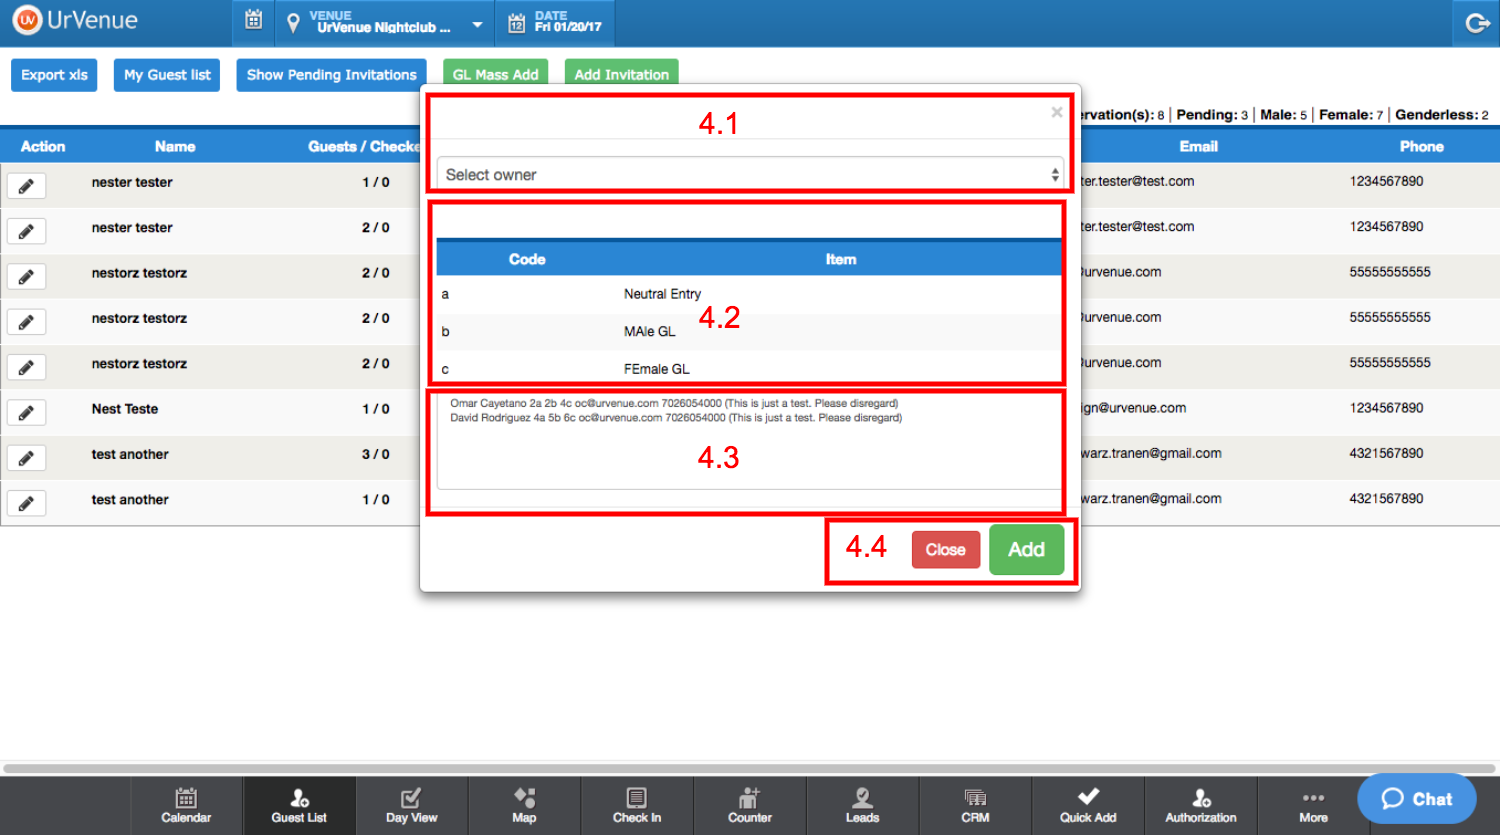
- GL Mass add - With this option we will be able to add various guest lists with various guests under them, directly to the system, once we click on it we will see a pop-up window.
4.1 Name of Booker
4.2 Code/Item: The code would be the letter A, B or C and the item would be what corresponds with said letter A is for a Neutral Entry, B is for a Male Guest for the GL and C is for a Female Guest for the GL.
4.3 This would be the necessary format for the guest lists to be added:
First invitation: firstname lastname 2a 2b 4c email@domain.com 7027027027 (instructions in parentheses)
Second invitation: firstname lastname 3a 1b 6c email@domain.com 7026054000 (instructions in parentheses)
And so on for the number of invitations you want to send out.
4.4 Here we can Add or simply Close the guest list, this last option to close will not save the guest list in the system.
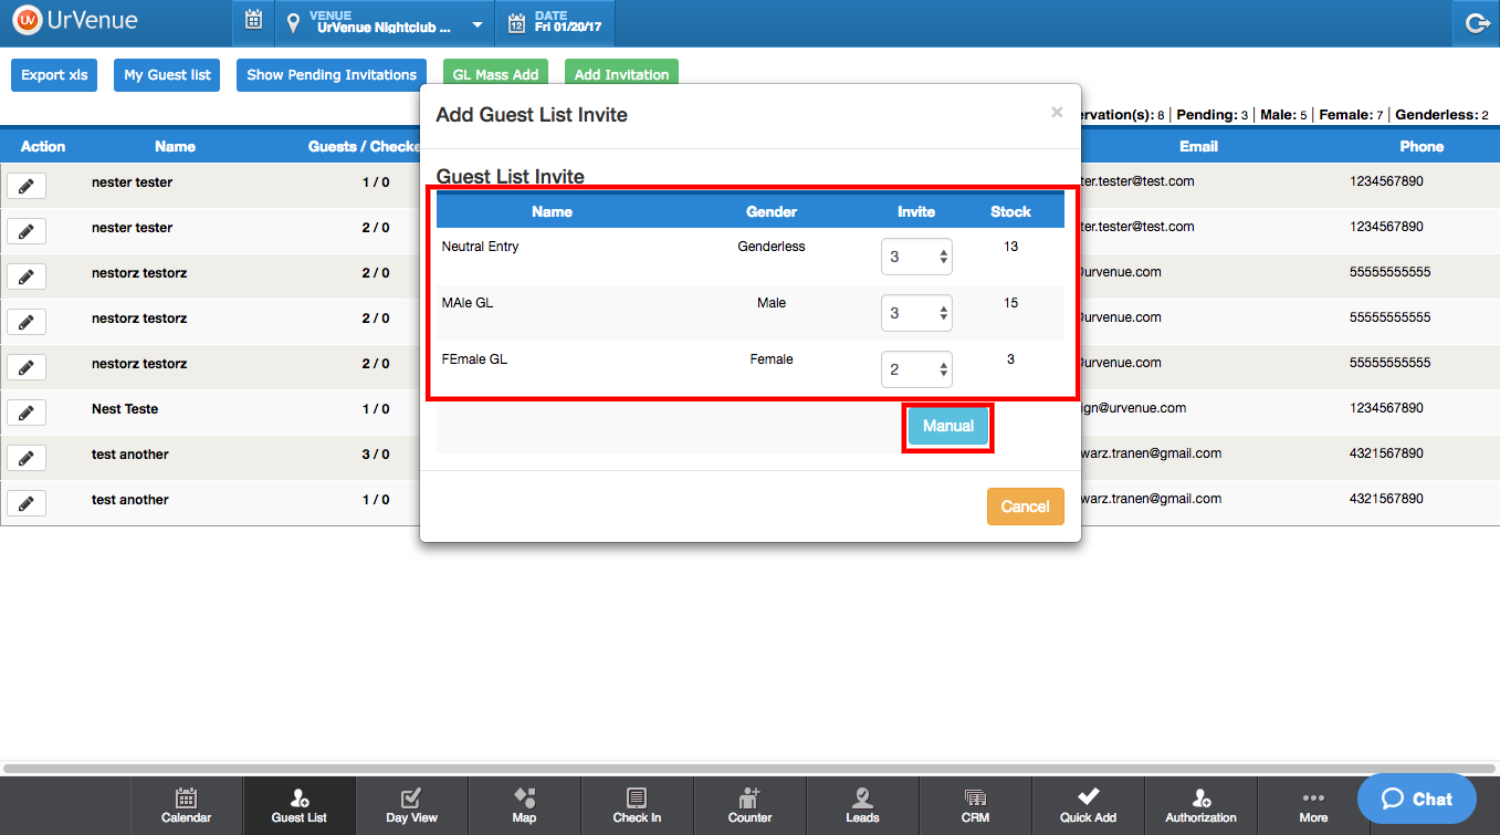
- Add Invitation:
- Here we see a pop-up window Name of the item Neutral Entry, MAle GL, FEmale GL,
- Gender of each item Genderless, Male & Female.
-
Invite, here we select how many guests of each item we will be sending out in this invitation. Manual, once we finish adding the number of items for this invitation we click on Manual.
- We then see another pop-up window requesting the information of the person who will receive this invitation:
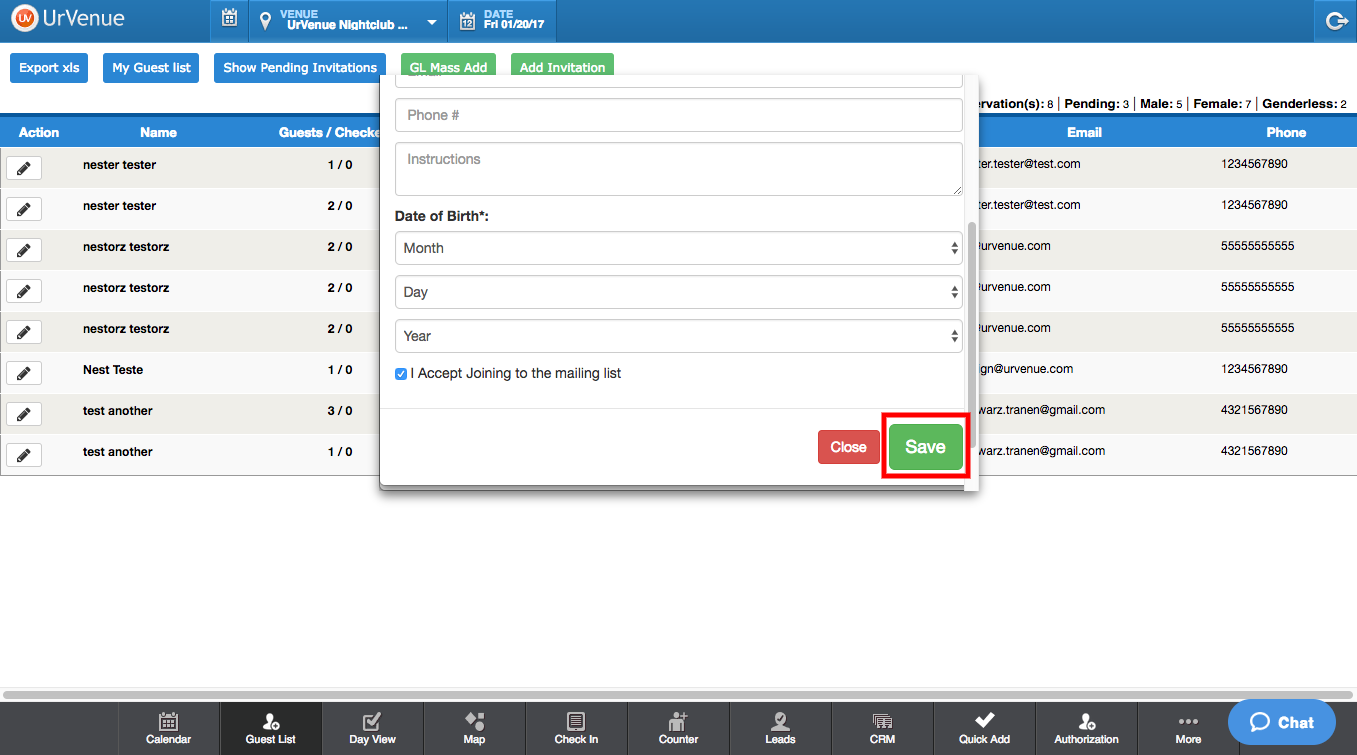
- Name, Last Name, Email, Phone #, Instructions, Date of Birth that includes Month, Day and Year, once finished we click on save, this will automatically send the invitation via email to the customer.
- Here we see a Summary of what can be found, the number of guests, number of reservations, pending reservations, quantity of Males, Females and Genderless.
