No Show
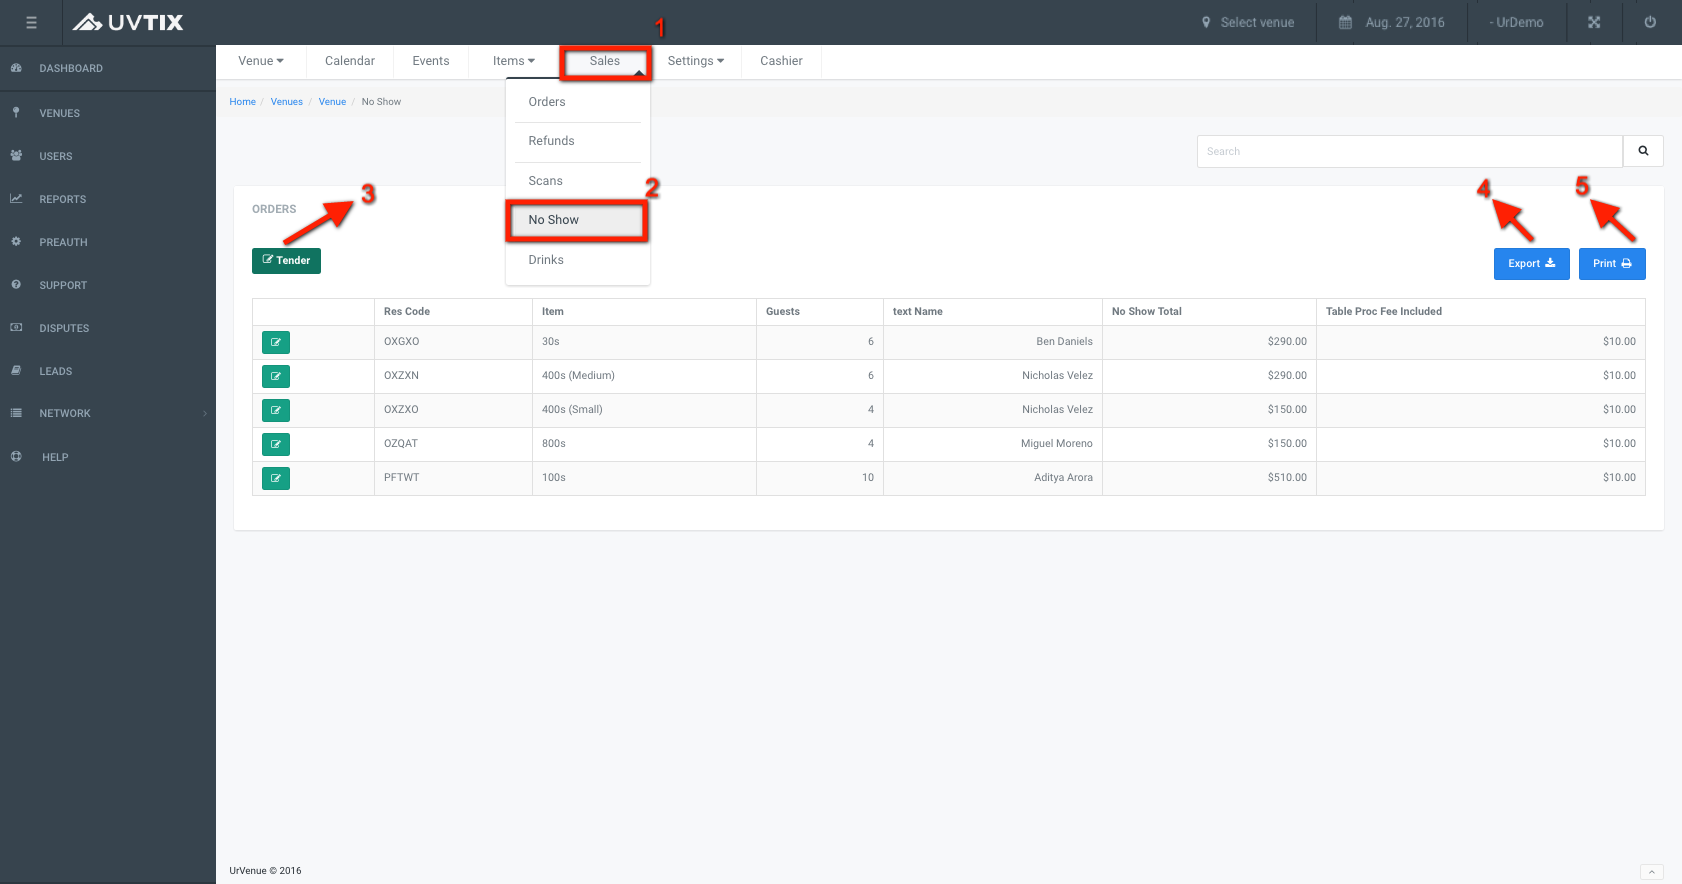
Once in UvTix, you can select a venue and a date to get to Sales (1).
By selecting No Show (2) in the dropdown menu you will see all the General Admission tickets and approved tables with No Show status.
These are reservations of 2 types:
-
Future reservations (future dates and events):
- In these cases once the date of the event comes, the reservations are linked by the staff to a check number from the POS (Point Of Sale Syetem) to charge the clients for their consumptions at the venue (food, beverage, transportation, etc).
-
Past reservations (past dates and events) from clients who did not show up at the venue:
- These reservations were archived to use the available sections (tables) for other clients who did show up, changed from one type of table to a different one, and/or clients that purchased tickets at the door.

There is information in the list view, and some actions that can be performed:
3. Tender:
-
Future reservations:
This function allows to link a table reservation (bottle service) with a check from the POS for charges like food, beverage, transportation, etc.
-
Past reservations:
If clients arrive late to the venue and their reservation is still as No Show (not used), this is the option to change the status to Active (checked in / used) and link it to a check from the POS for incidental charges such as food, beverage, transportation, etc.
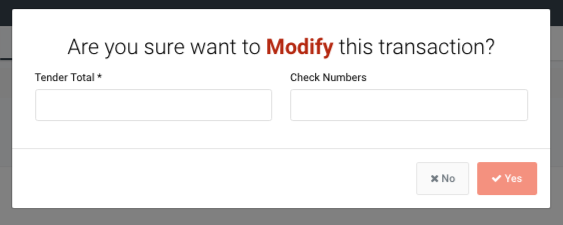
If you click the green button next to a reservation, a pop-up window will open with the text "Are you sure you want to Modify this transaction?", along with the boxes where you should enter a Tender Total amount and Check numbers. By doing this and clicking the red button that says Yes in the bottom of the window, the reservation will change status and get linked to the check(s) from the POS. To exit click No.

4. Export:
If you click this light blue button, the list of orders converts into an XLS (Excel) file and is saved to your computer.
5. Printt:
If you click this light blue button, a pop-up window opens to select the printer, set up the printing characteristics or visualize the file in PDF format.