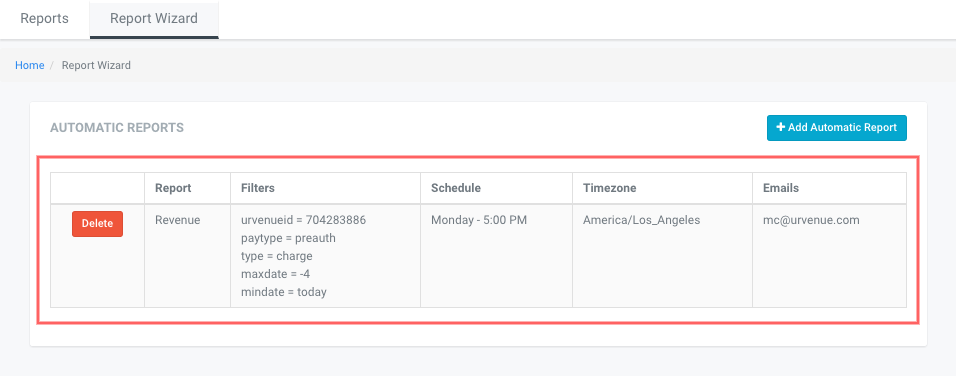
Report Scheduler
Report Scheduler is a feature where you will be able to add as many different types of reports as needed, and schedule them to be generated and sent to a provided email address at the configured date and hour.
Adding a Report
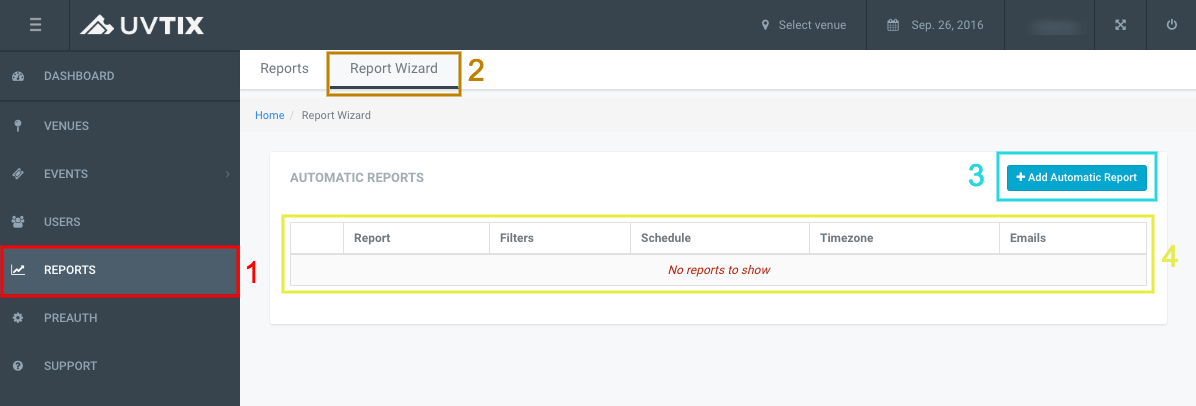
Under your REPORTS tab on the menu to the left (1), you will see the Report Scheduler (2). You can add Automatic Reports (3) for every type you need and review the ones that you have already configured (4).
1. Report
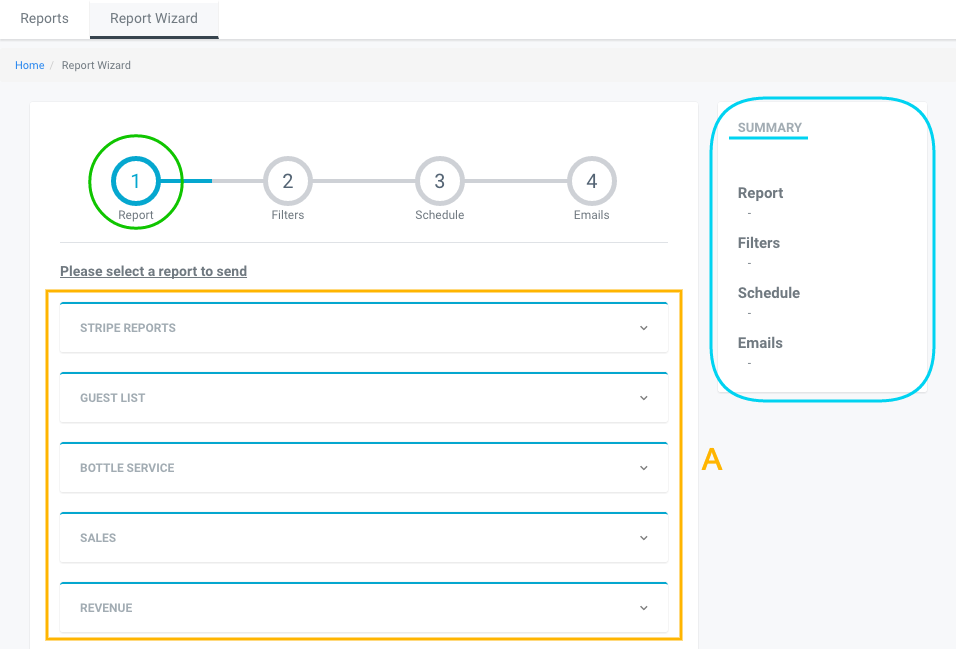
Here you will choose the type of report that you need generated, the list in the Scheduler is the same you have under Reports (A). To the right you can also see a Summary, which will be populating fields as you fill them so you can verify everything is correct.
2. Filters
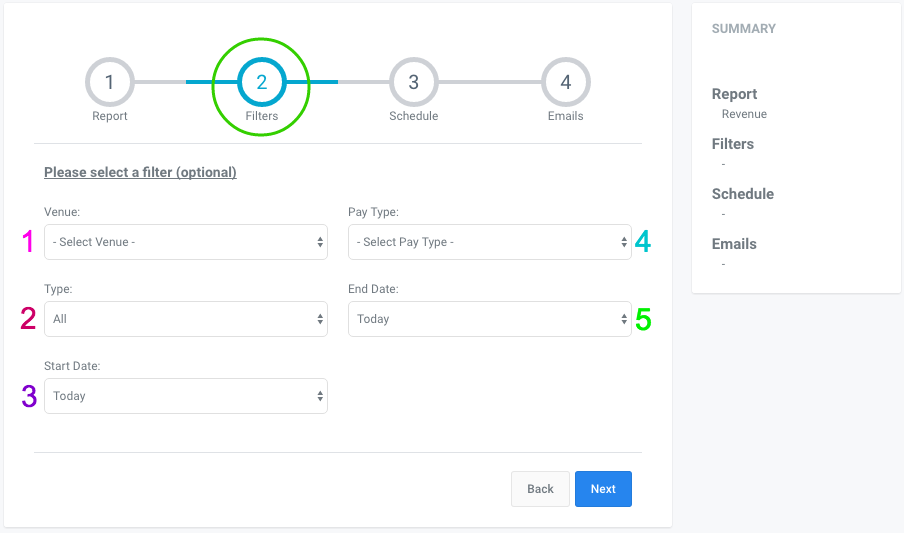
This section will allow you to choose a more specific type of report. All the filters vary depending on the report that will be generated, for example in a Stripe Reports>Revenue one, you would have the following:
- Venue: If your account has over one venue, you can choose for which one the report will generate.
- Type: This, since it's a revenue report, refers to the type of revenue you're getting, divided in: Charges, Refunds, Chargebacks, or all.
- Start Date: The date from which the report will begin, this can be customized and set, up to either one week before, or one week after.
- Pay Type: All the different means of payment customers use. This can be filtered by: Admissions (tickets), All Deposits (table deposits charged both online and preauth), Online Deposit, and Preauth.
- End Date: The last date considered within the report, it can be, as the start date, set up to one week before or after the current date.
3. Schedule
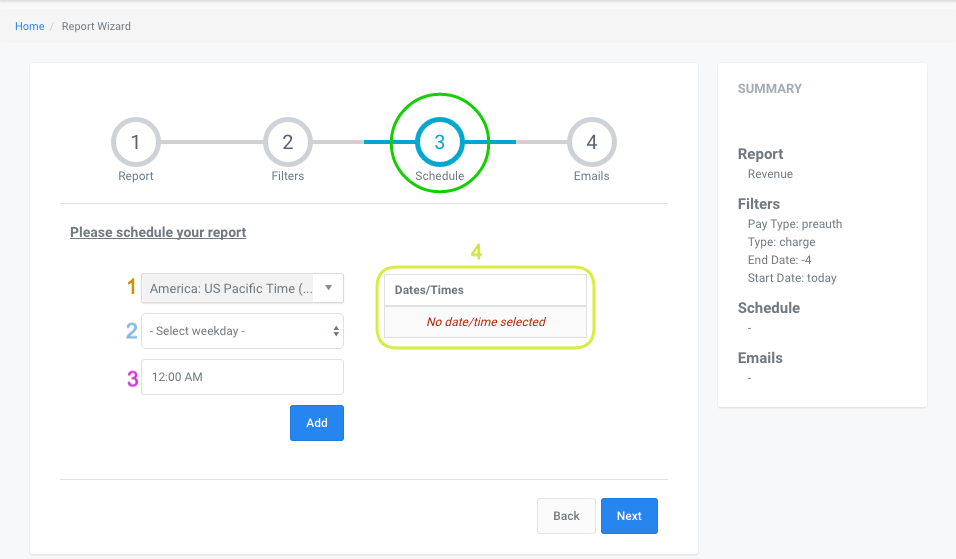
Since they will all be programmed reports to be automatically generated and sent, you will need to enter a date and time for this:
- Time Zone: You can set your time zone, or preferred time zone, for the report to be generated and sent.
- Weekday: You can choose your preferred weekday for these reports to generate. For example, if your business week ends on a Wednesday, you can set your reports to automatically generate on a Thursday, this way you'll make sure that all information is already entered to the system.
- Time: It will be the hour that your report will be generated at. You can only select hours on the dot to program your reports: 1 o'clock, 5 o'clock, etc.
- Dates/Times: This summary will populate once every field has been filled.

4. Emails
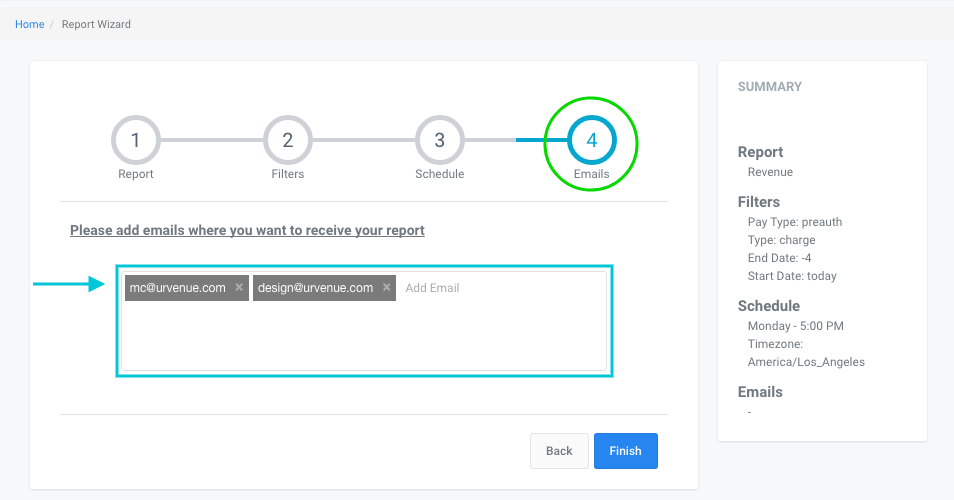
On the last step to configure your reports, you'll need to add all the emails that this will be sent out to.

Once you're done adding and configuring your report, click on Finish so it saves. You should receive a confirmation popup, and you will be able to see it listed in Automatic Reports.
