Guest List
Adding Guest List items
You can add Free Guest List tickets on your Day Inventory, to either send out as invites (through UV App), or have them available for guests on your website, alongside your standard General Admission tickets.
On your Day Inventory, you will be able to add this ticket type by choosing the 'Guest List' option on the item dropdown:
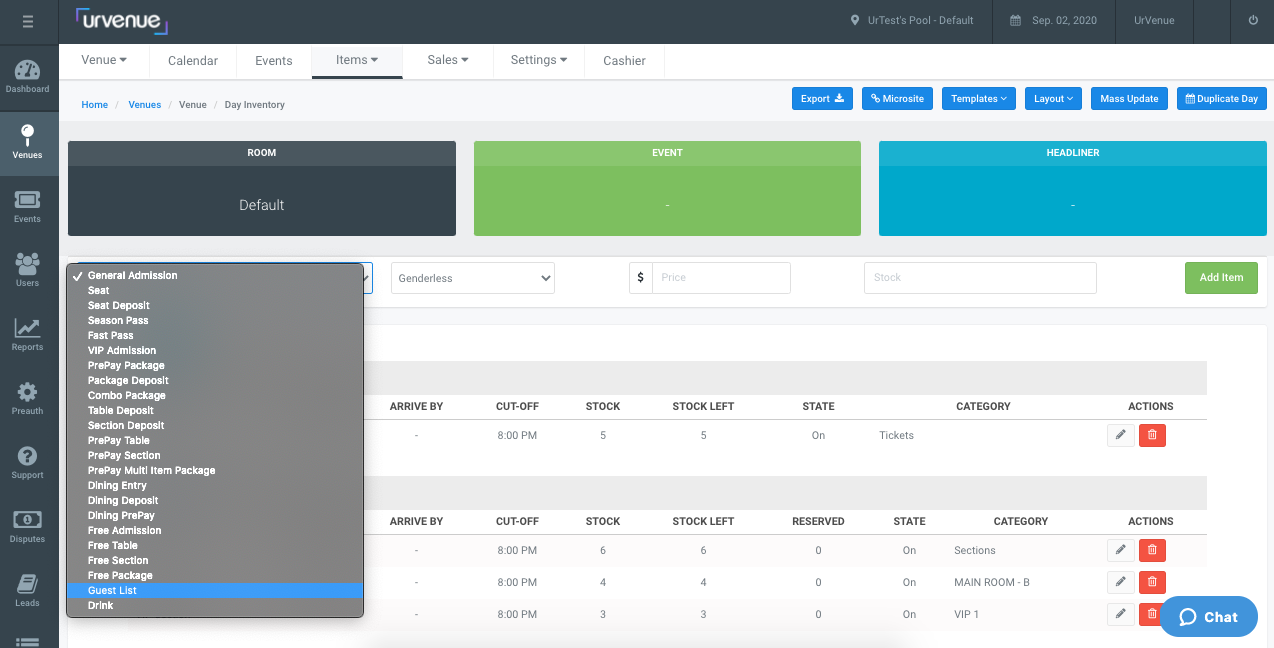
Once this type is selected, the 'Price' box will block. You will then choose the gender for this item and the amount of tickets that will be available:

Click on 'Add Item' to finish setting up the ticket's features:
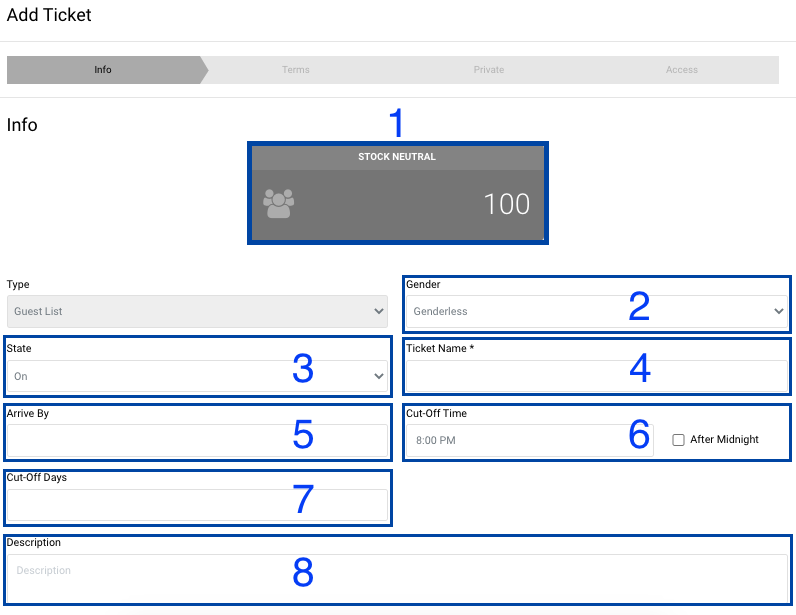
- Stock: Here you can edit the amount of tickets that will be available.
- Gender: As with the rest of the items, you can select 'Male', 'Female', or 'Genderless'.
- State: Allows you to turn off or display as sold out the ticket.
- Ticket Name: Enter the name you want for your item to display, for example: 'Ladies Guest List', 'Male Guest List', 'Ladies Industry', 'Male Industry'.
- Arrive By: Select the hour that you want the guest to arrive by for the ticket entry to be valid.
- Cut-Off Time: You can enter a cut-off time for this ticket type on the event date, in case the amount of available tickets set does not run out before the event begins.
- Cut-Off Days: This option is to set the amount of days, before the event, you would like the tickets to stop displaying on your website, regardless of the stock. On your mobile device the option will disappear as well.
- Description: Enter the item description, if any additional information is needed.
Ticket website availability
When we add a GL ticket, it will be available for customers in our website, as well as for the staff to share as an invite using the UV App.
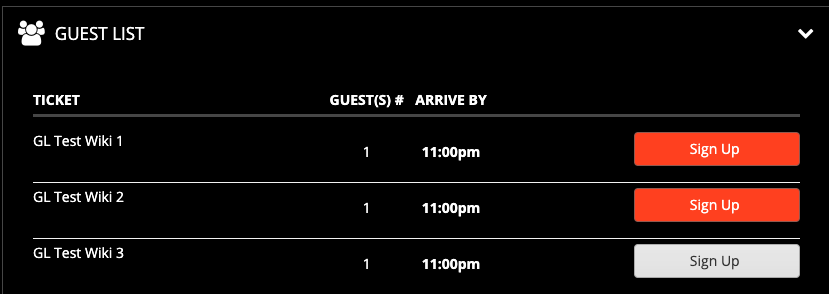
If we don't want this item to display in the site and just wish to keep it as a private ticket for us to share personally via email, while setting it up go to the tab labeled 'Private', and mark the checkbox for 'Private Ticket':
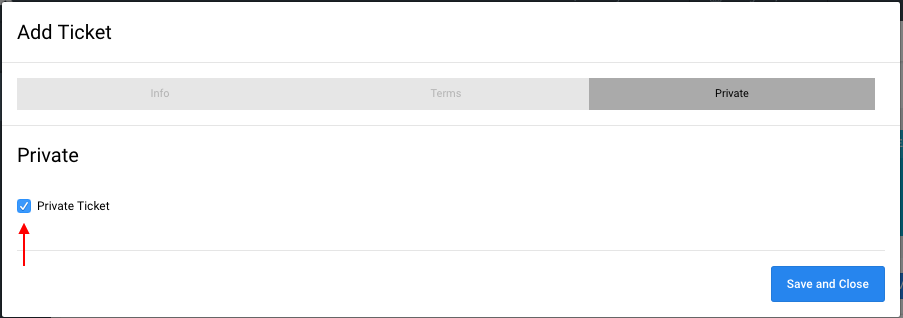
This way it will not be shared in the website, but will be still available through UV App to send invitations.
Ticket Access through Media
You can configure the Media Access for your Guest List tickets while setting up the item:
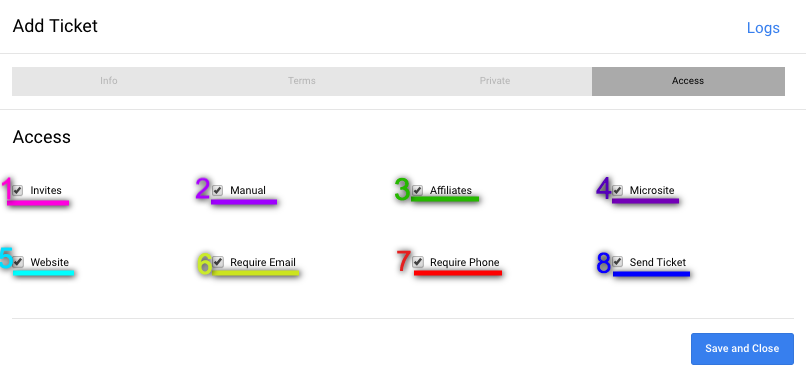
1. Invites: Having this selected, we will be able to send invites using UV App, either via Email or SMS. Deactivating it will remove these options for the item type.
2. Manual: Having this selected we will be able to manually send the tickets, filling first the customer's information ourselves.
3. Affiliates: If we activate this option, our Guest List tickets will display also on all Affiliate sites.
4. Microsite: When this is checked, the Guest List tickets display on every user's 'Microsite' or 'Event Share'.
5. Website: As with the 'Private' option, checking this off blocks the item from displaying on your website.
6. Require Email: This will make the 'Email' field on the forms, a mandatory field, if no email is entered the form can't be submitted.

7. Require Phone: This will make the 'Phone' field on the forms, a mandatory field, if no phone is entered the form can't be submitted.

8. Send Ticket: This feature will send the ticket automatically once the customer signs up for the guestlist.
Using Guest List items from UV App
GL Invite
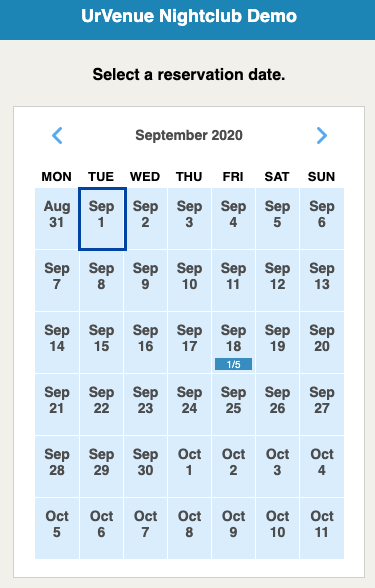
Access your account in your phone's UV App, select the Venue and Date this item is present on:
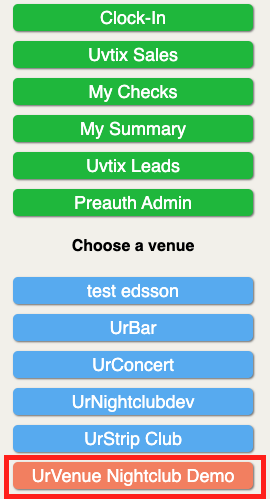
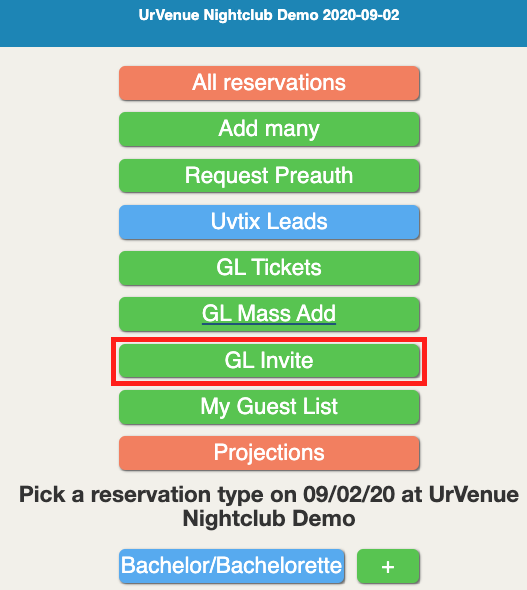
From the Day View you will see the Guest List option, enter to generate 'Invites' and send out:
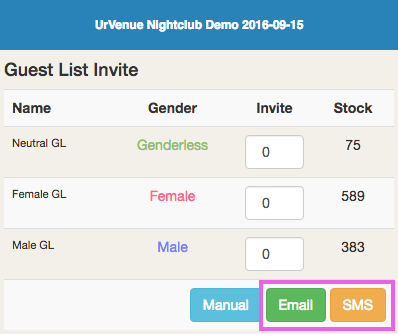
After you select the number of guests you will generate the ticket for, you will be able to send the invitation three different ways:
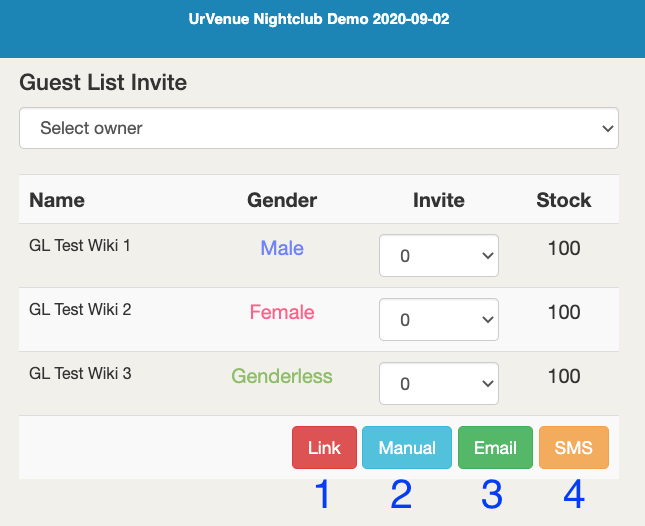
- Link: Allows you to send a custom link to a customer with the amount of guests.
.png)
- Once you select a quantity of guests for the invitation and you tap on the link button a box will prompt you to provide a name.

- Once you have provided the name to the box and tap on the send button a new box will appear with the link. Please copy it so you can send it to the customer.
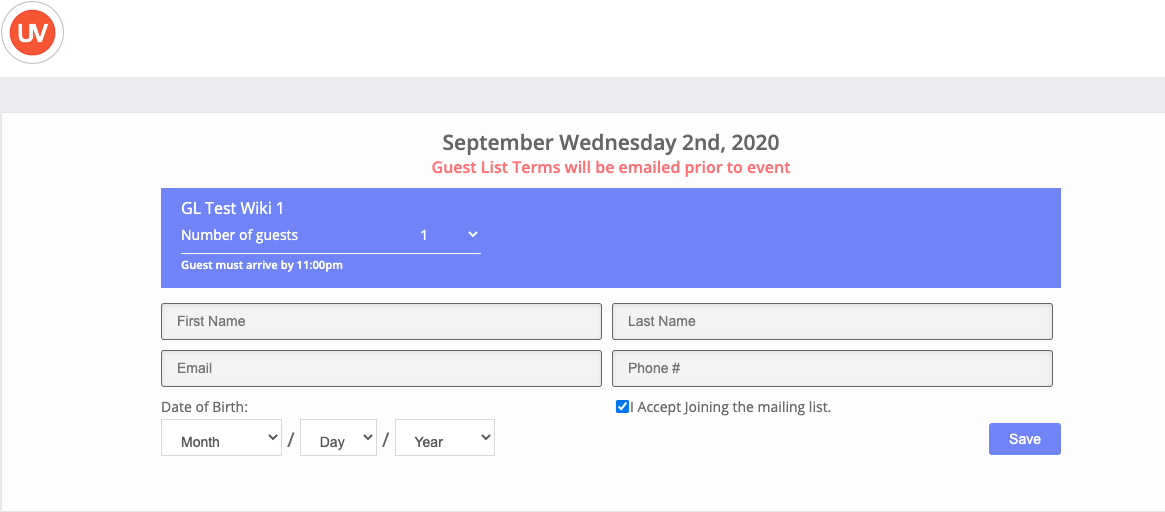
- This is what the customer will see once the link is sent to him. He will just need to fill out the form and click on save, please remeber that all fields are mandatory to fill out.
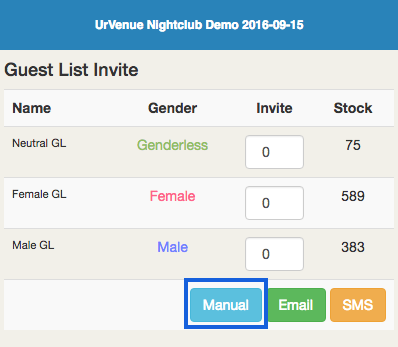
- Manual: This option is to enter all of the guest's information yourself, the same information the customer would use to fill up the GL Form and send the tickets directly to their email address. Upon clicking you will get this popup window:
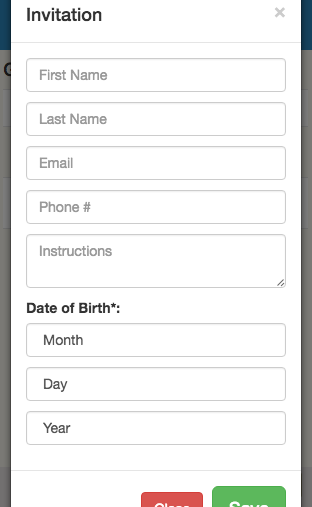
After saving you will get a confirmation window on the screen letting you know the invitation has been added. This ticket is automatically sent to the customer under the name you input on the form.
- Email: Send the invitation link via email, for the guests to fill out their information themselves. If you choose this option you will first get a popup window so you can enter a name for the invitation:
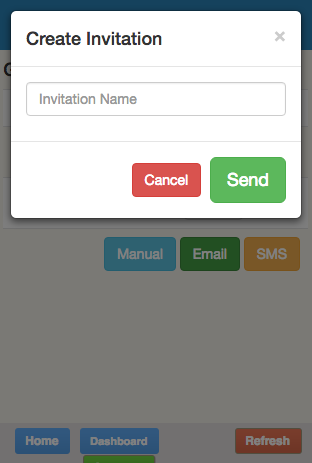
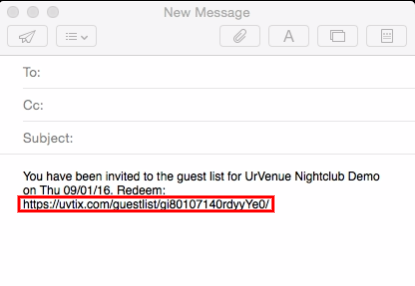
The email sent out will contain a link for your guests to redeem their invites.
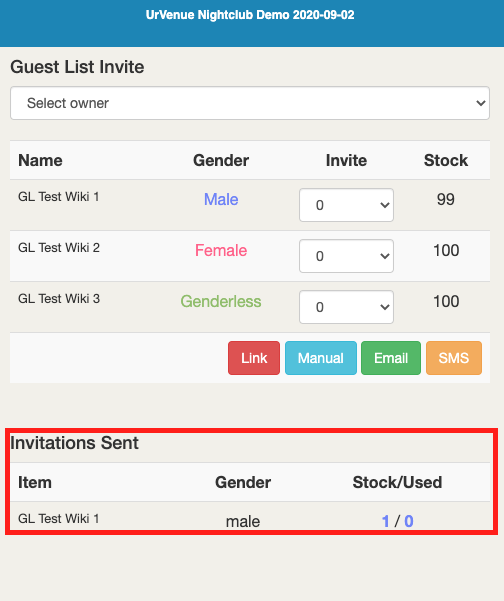
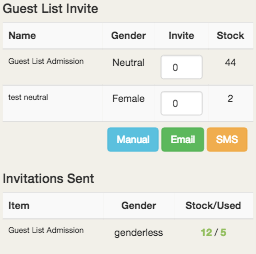
As soon as you generate them, they will add to a list below, and you will be able to see:
- how many invitations you have sent,
- for which item,
- how many you have in stock
- how many have already been used/redeemed
On the link sent out, all fields will be mandatory for guests to fill out, First and Last Names, email address, phone number and date of birth. The arrive by time will always display at the top, letting the guests know what time they need to arrive in order for their tickets to be valid.

Each link will be unique, and will only work once for the exact quantity configured. This information will display on a header above the text boxes, for example: Valid for 2 Guest(s). As soon as all fields are filled out for every link, the following text will display and the link will be void:
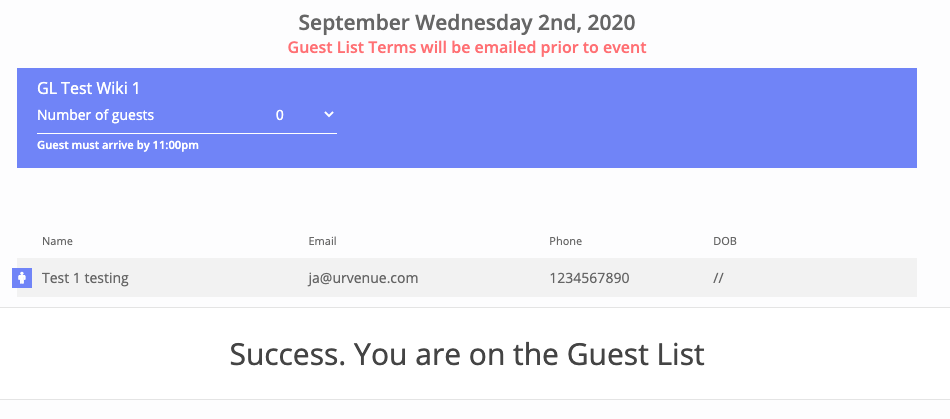
No link can be used more than one time, if they click again on the invitation link or refresh their page, the following will display:

Once the guest completes the link form, the GL Ticket is sent to his/her email address. In the users' app profile the invitations' status will also update, so they can keep better track of the stock, as well as all pending and used invitations.
GL Mass Add
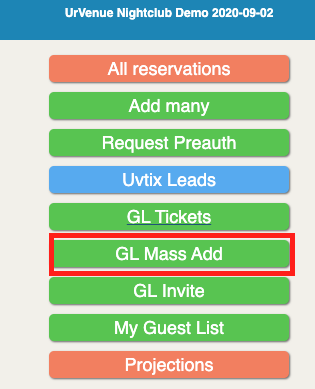
This feature allows you to add several reservations at once:
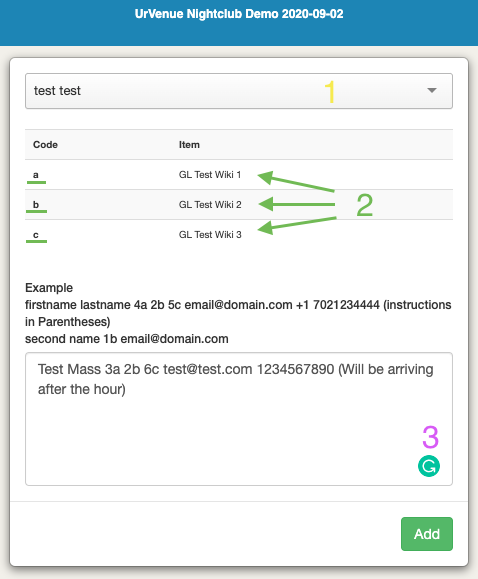
1. Owner: At the top you can see the loged in user name, when you click here it allows you to choose any other user to assign the reservations to. 2. Item Code: When you are using the mass add option, you will need to input the code of the item that will be added. For example, here 'a' is for the Neutral Guest List, and 'b' is for the Male Guest List. 3. Reservation information: Here we enter the full customer information for the item that will be added. For the reservation to be added successfully in the system, it will have to be entered in the following order:
- First Name
- Last Name
- Guest number and item code, with no spaces in between, for example '4a', '2b'. If you will be adding over one item type, you should type the first guestnumber+code and after a space the second guestnumber+code, for example 3a 2b 4c
- Email Address
- Phone Number
- Instructions - if you want to enter any, they will need to be input in parenthesis
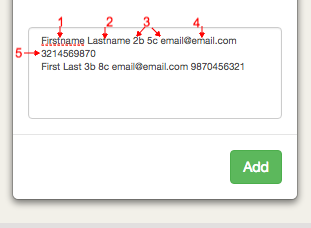
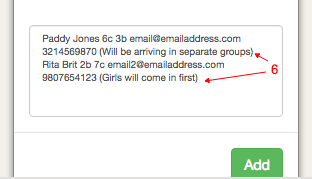
Every guest that's added should be entered with the same information type and same order (all fields are mandatory, except Instructions), and they should be separated, entering them in a different line - but with no lines in between.
Once you click on the Add button, the tickets will be generated and sent out to the guest's email, as with the Manual feature.
My Guest List
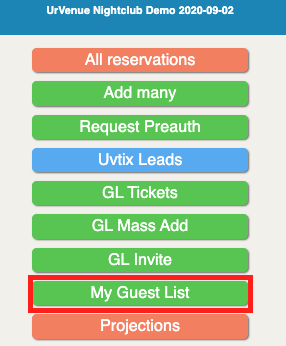
Here you have access to the details on all the invitations that you have sent out:
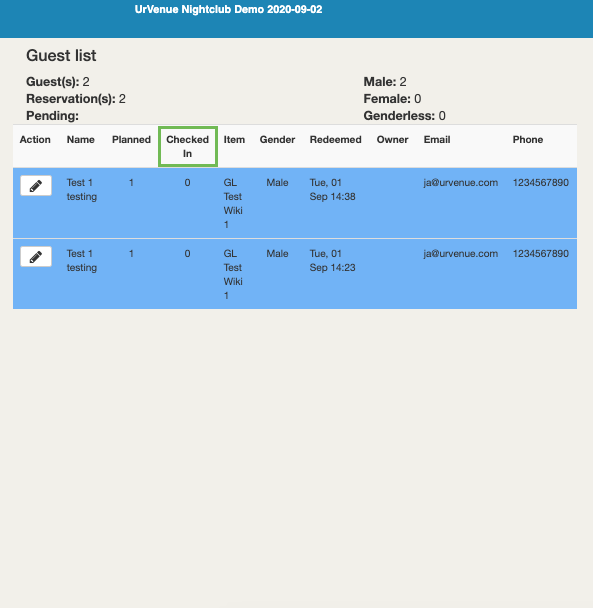
- Total Guests quantity, the global amount of people you have generated invitations for.
- The number of Reservations, since just one reservation is generated when you add an invitation, regardless of the guest quantity, this number will most likely be always different from the Guests'.
- Pending invitations to be redeemed.
- Guest gender detail: Male, Female, Genderless
And below this summary are all reservations detailed, including all information for the guest, as well as the amount of guests that have already been checked in for each generated invitation.
Ticket Layout
Guest List tickets are laid out differently from regular General Admission tickets:
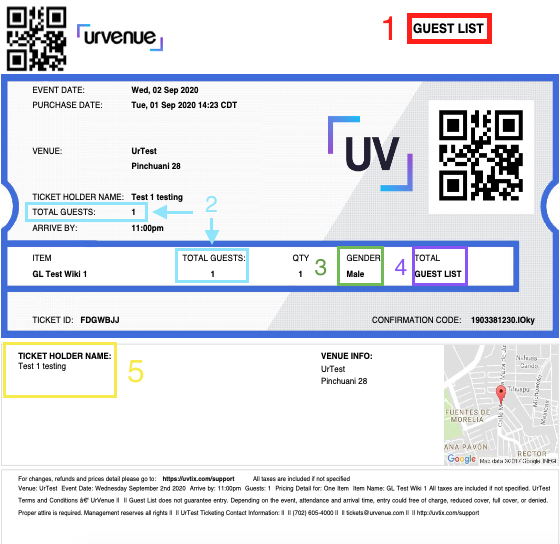
- Every ticket reads 'Guest List' instead of 'This is your official e-ticket', on the upper right hand.
- Total Guests Quantity can be for more than 1 guest. For some venues ticket's can be scanned once per guest.
- 'Gender' description is included, this way you can verify that only girls access with a 'Female' gender ticket, etc.
- On the 'Total' field, instead of having a ticket price, we will have 'Guest List'.
- There is no card information below the ticket holder name.